November 10, 2021 in #tech
🔌 standing desk cable management
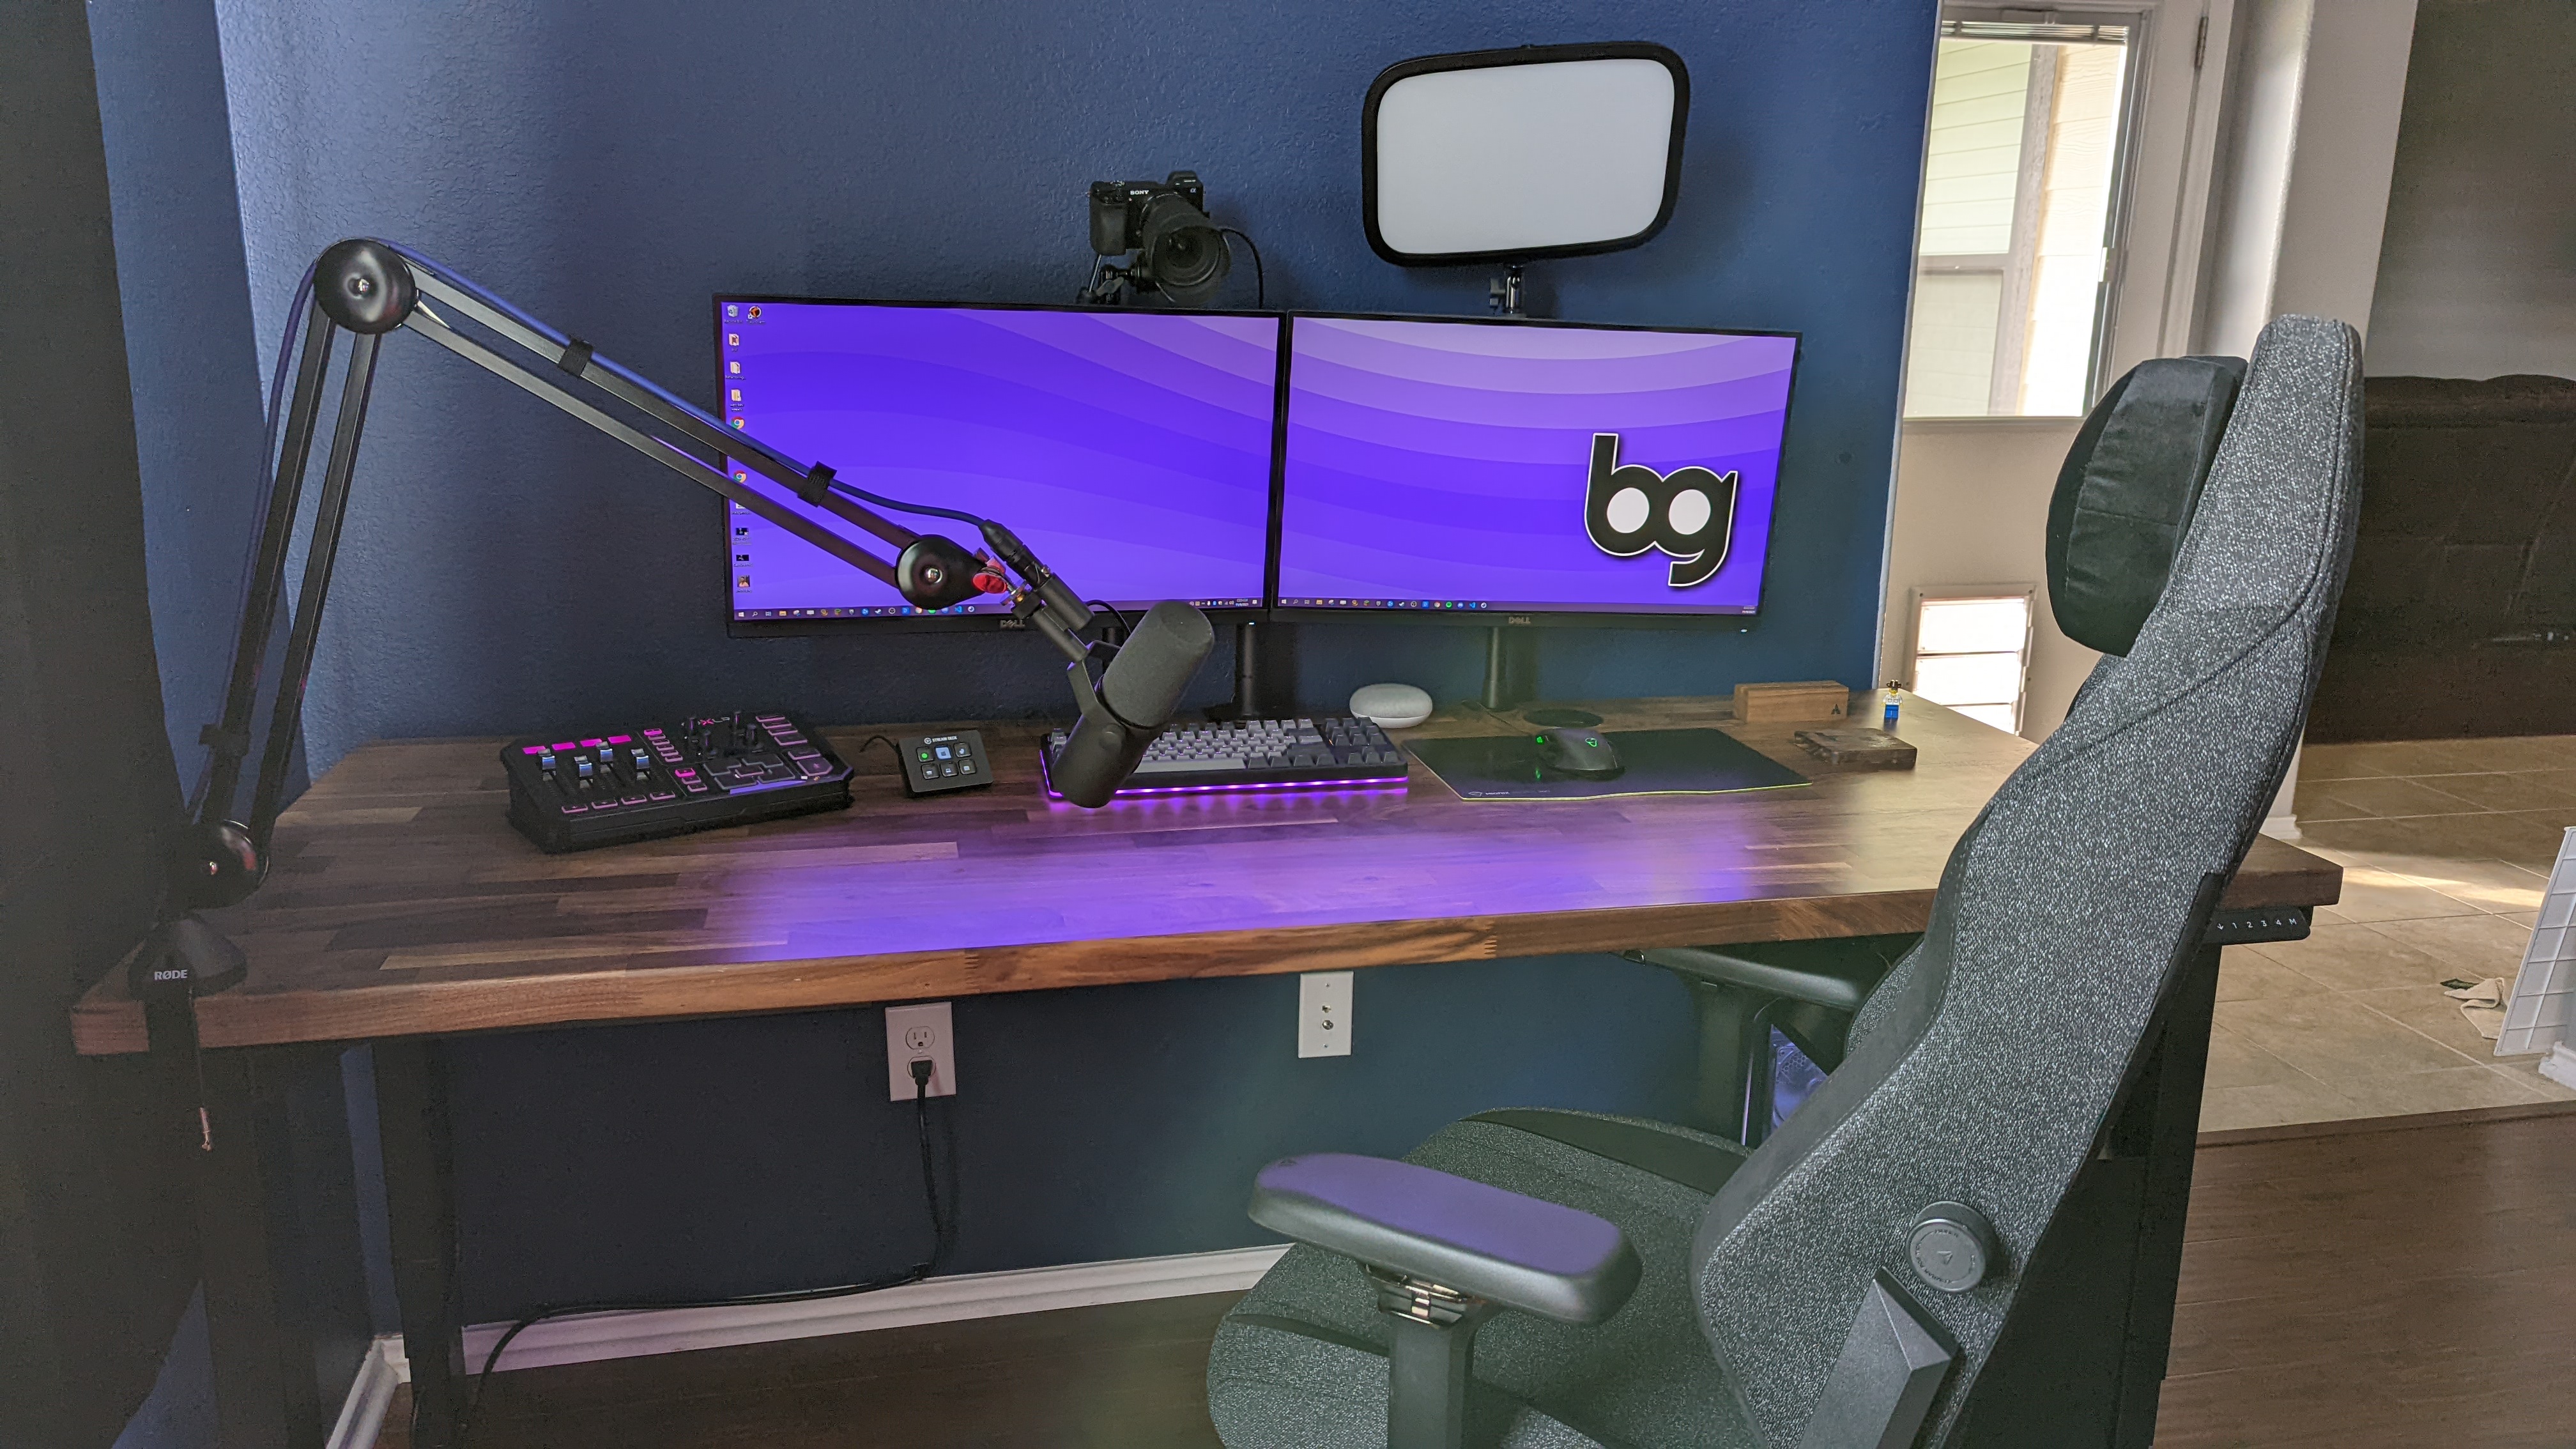
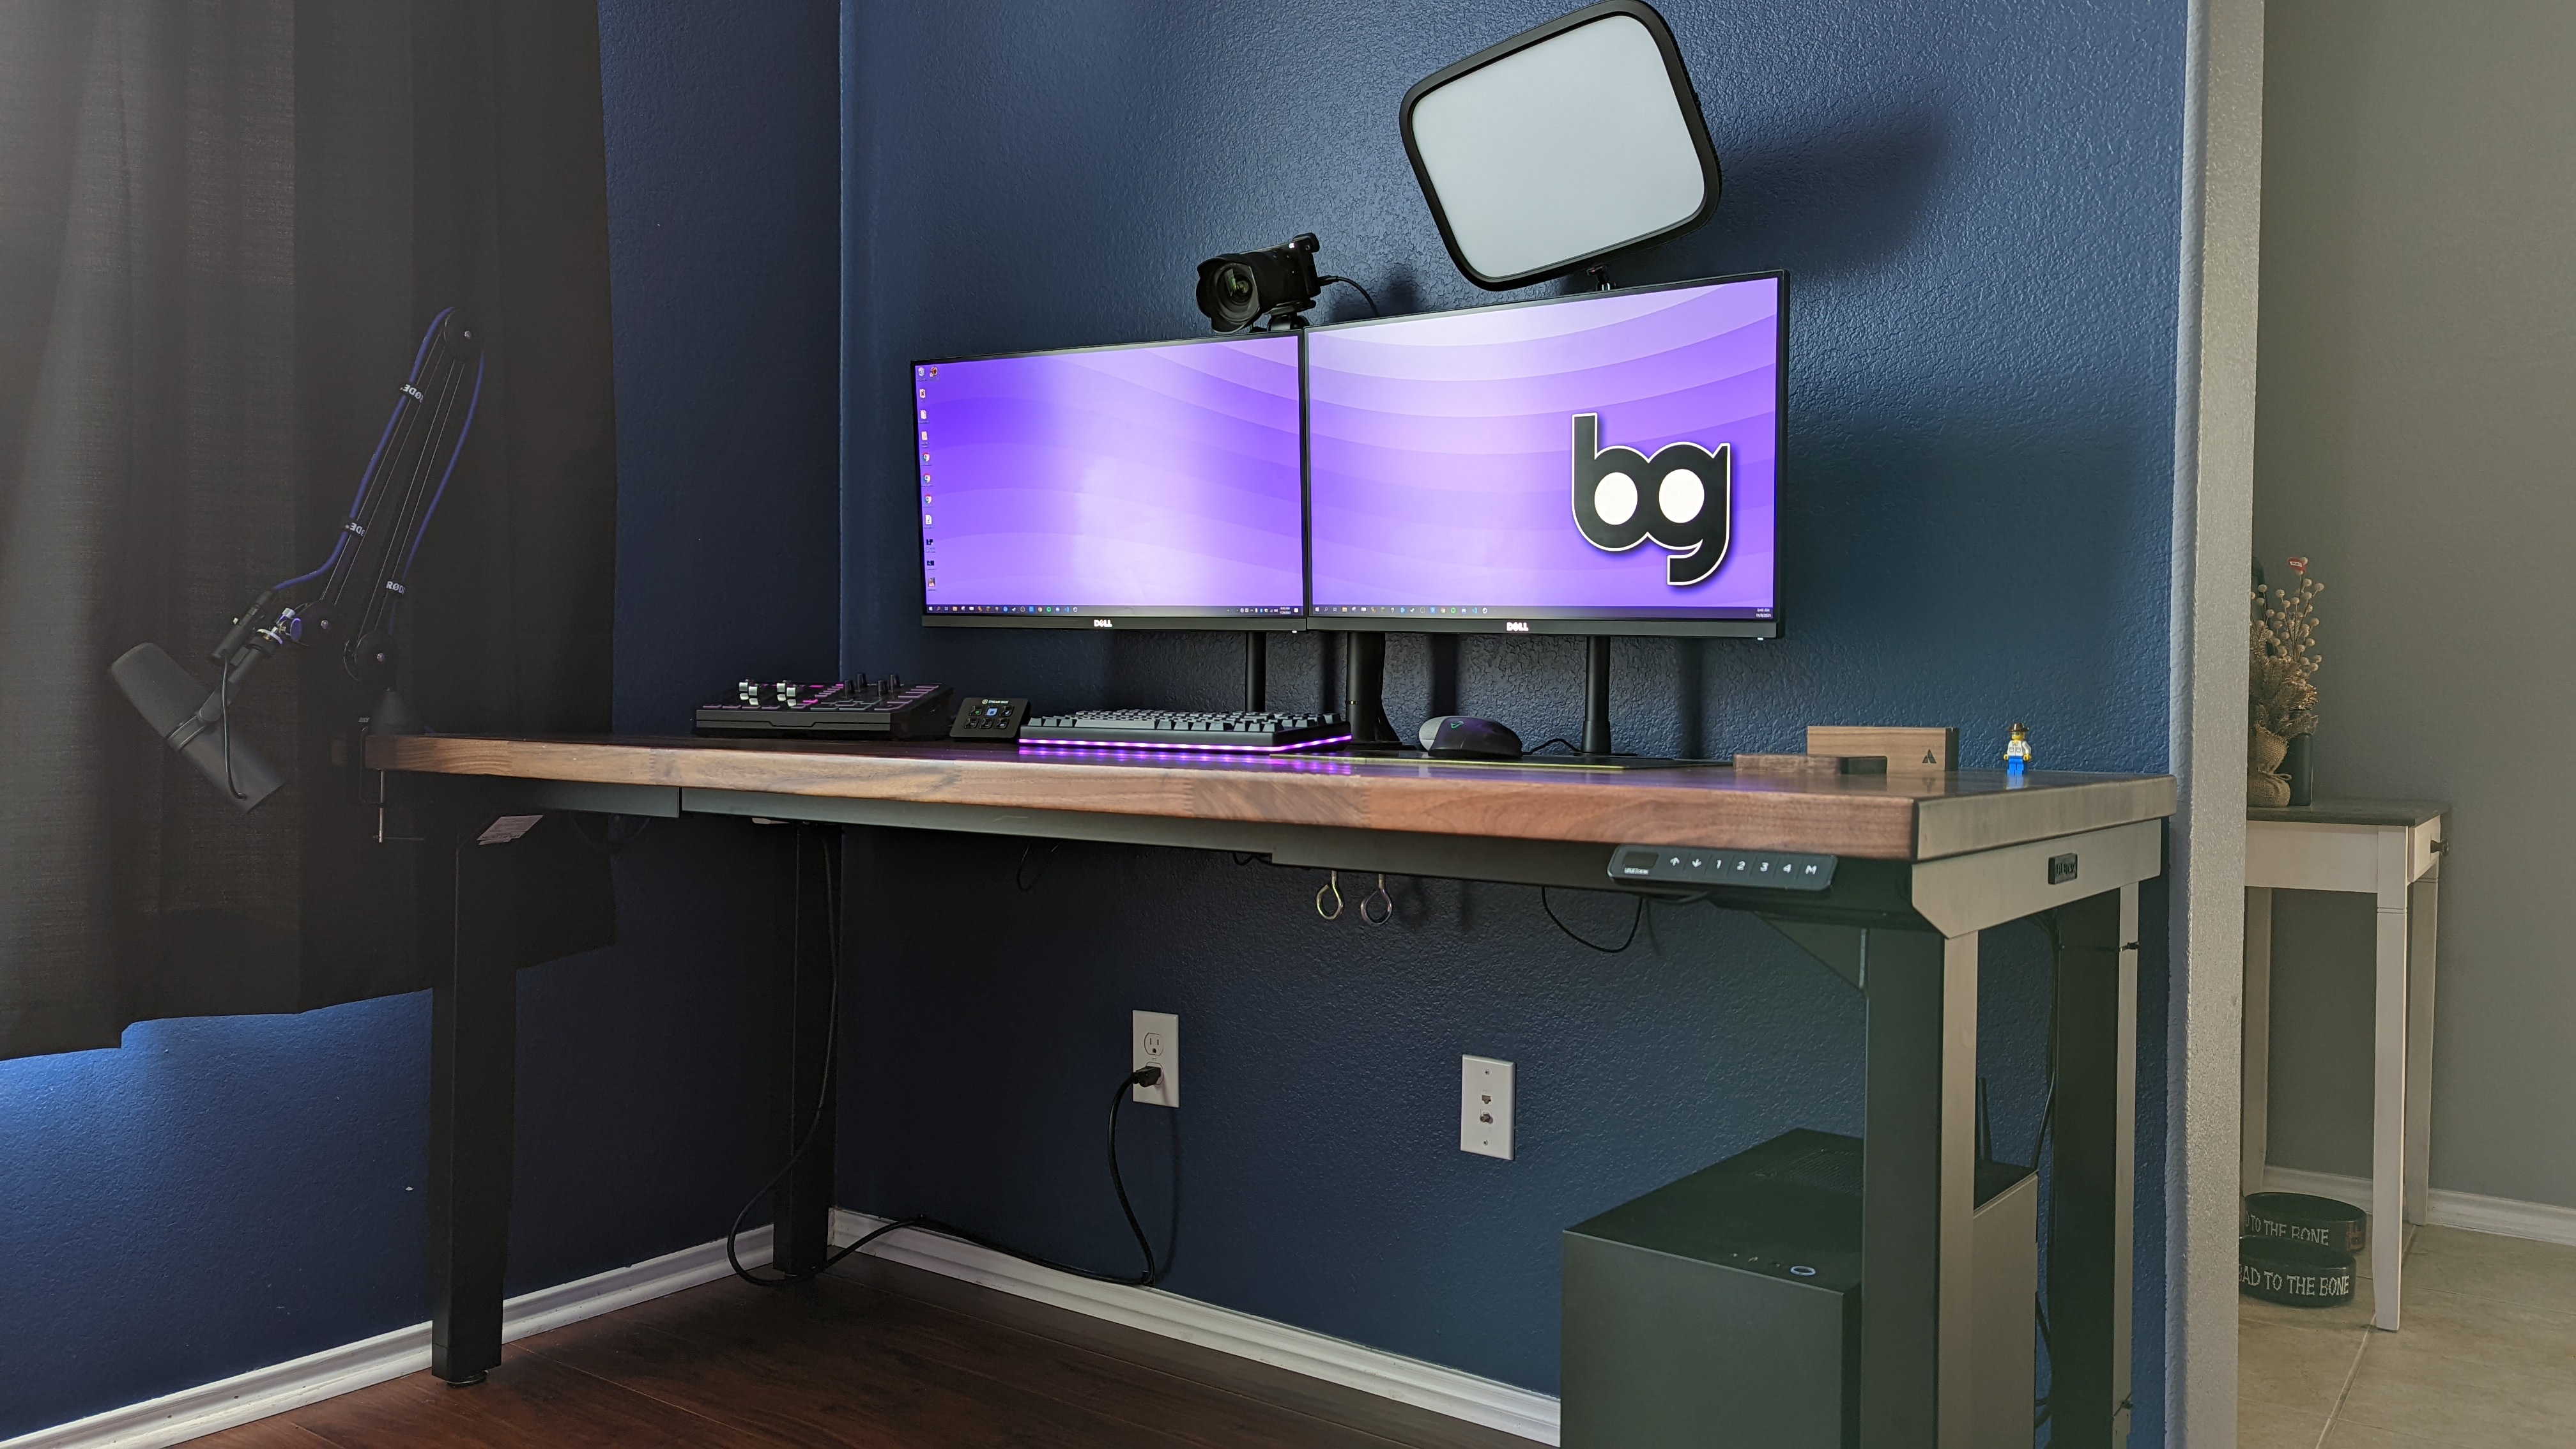
During the midst of COVID while I was working from home, I decided to purchase an UPLIFT standing desk. As you probably know, I have a lot of equipment on my desk because I create content. Due to the insane amount of cables, I wasn't able to use the desk in the standing position. Months later, I finally got around to managing the mess, and I think the final result looks beautiful.
I had a few goals in mind when I started this project.
- No visible wires
- Minimize outgoing wires
- Desk mounted peripherals
- No wires touching my feet or legs while sitting
- Usable in both the sitting and standing position
With so many power cords and USB cables, I needed some special hardware, plenty of zip ties, and tons of patience to get it done.
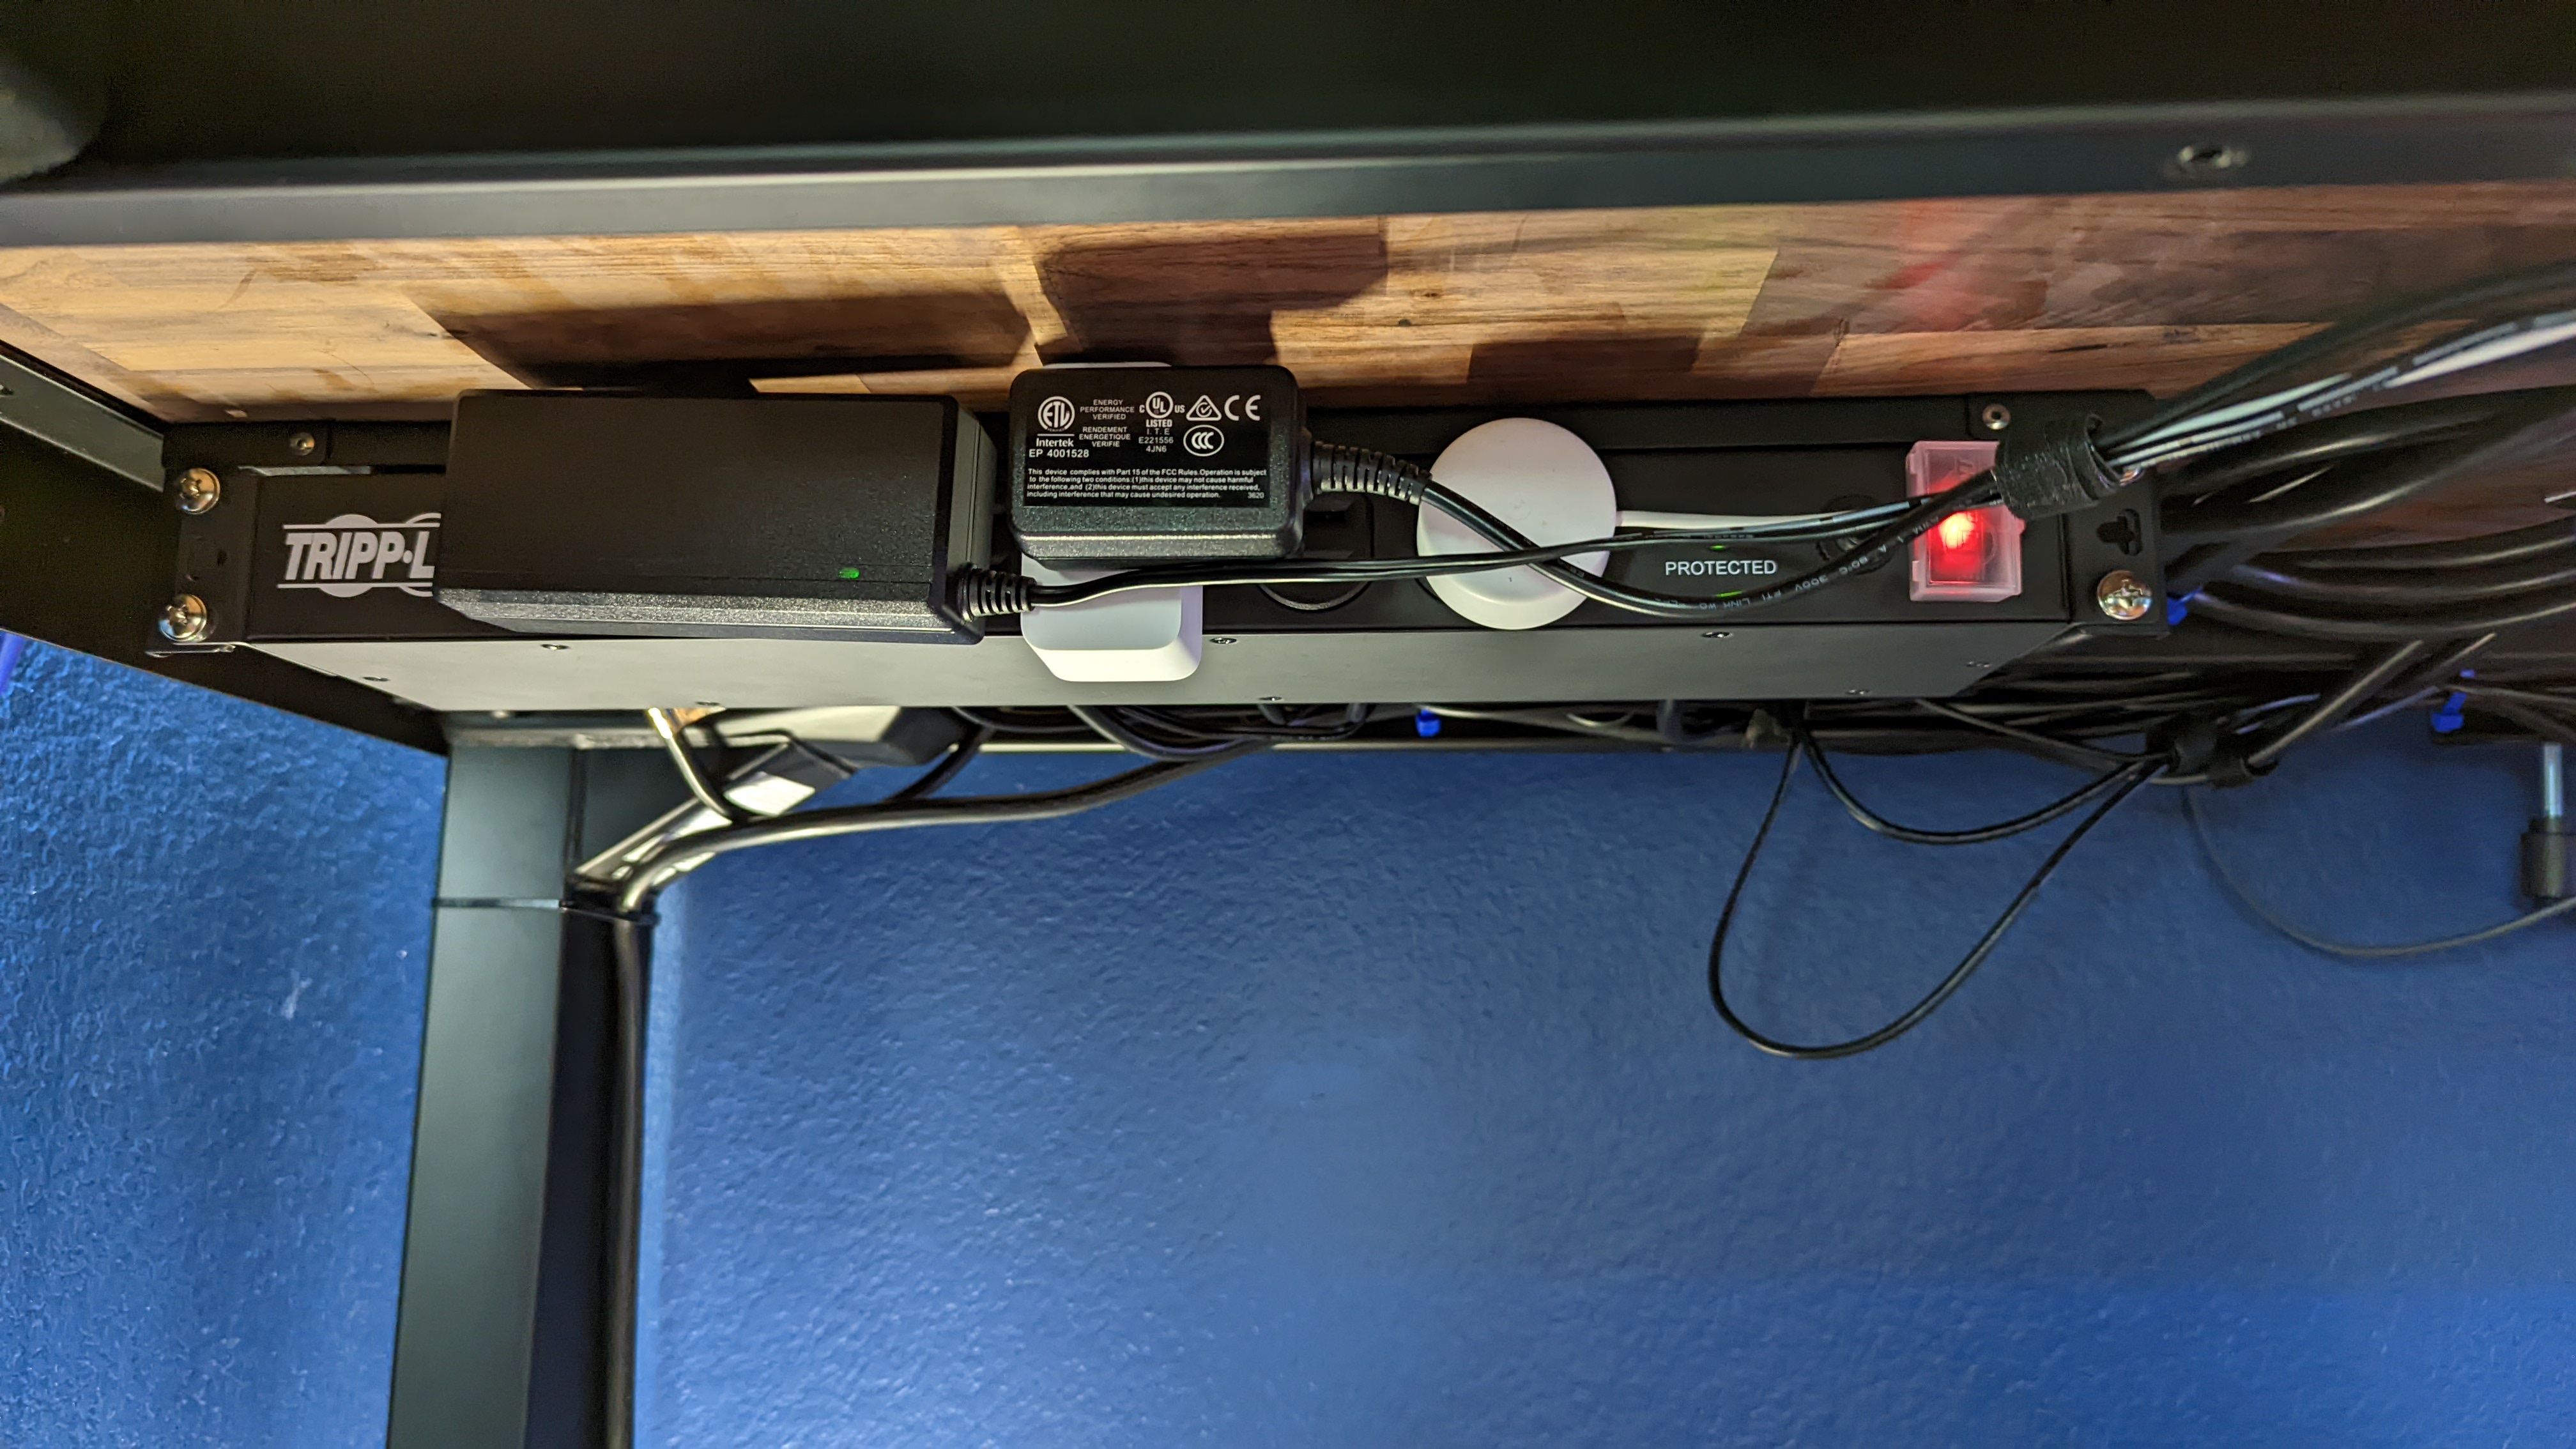
⚡ power supply
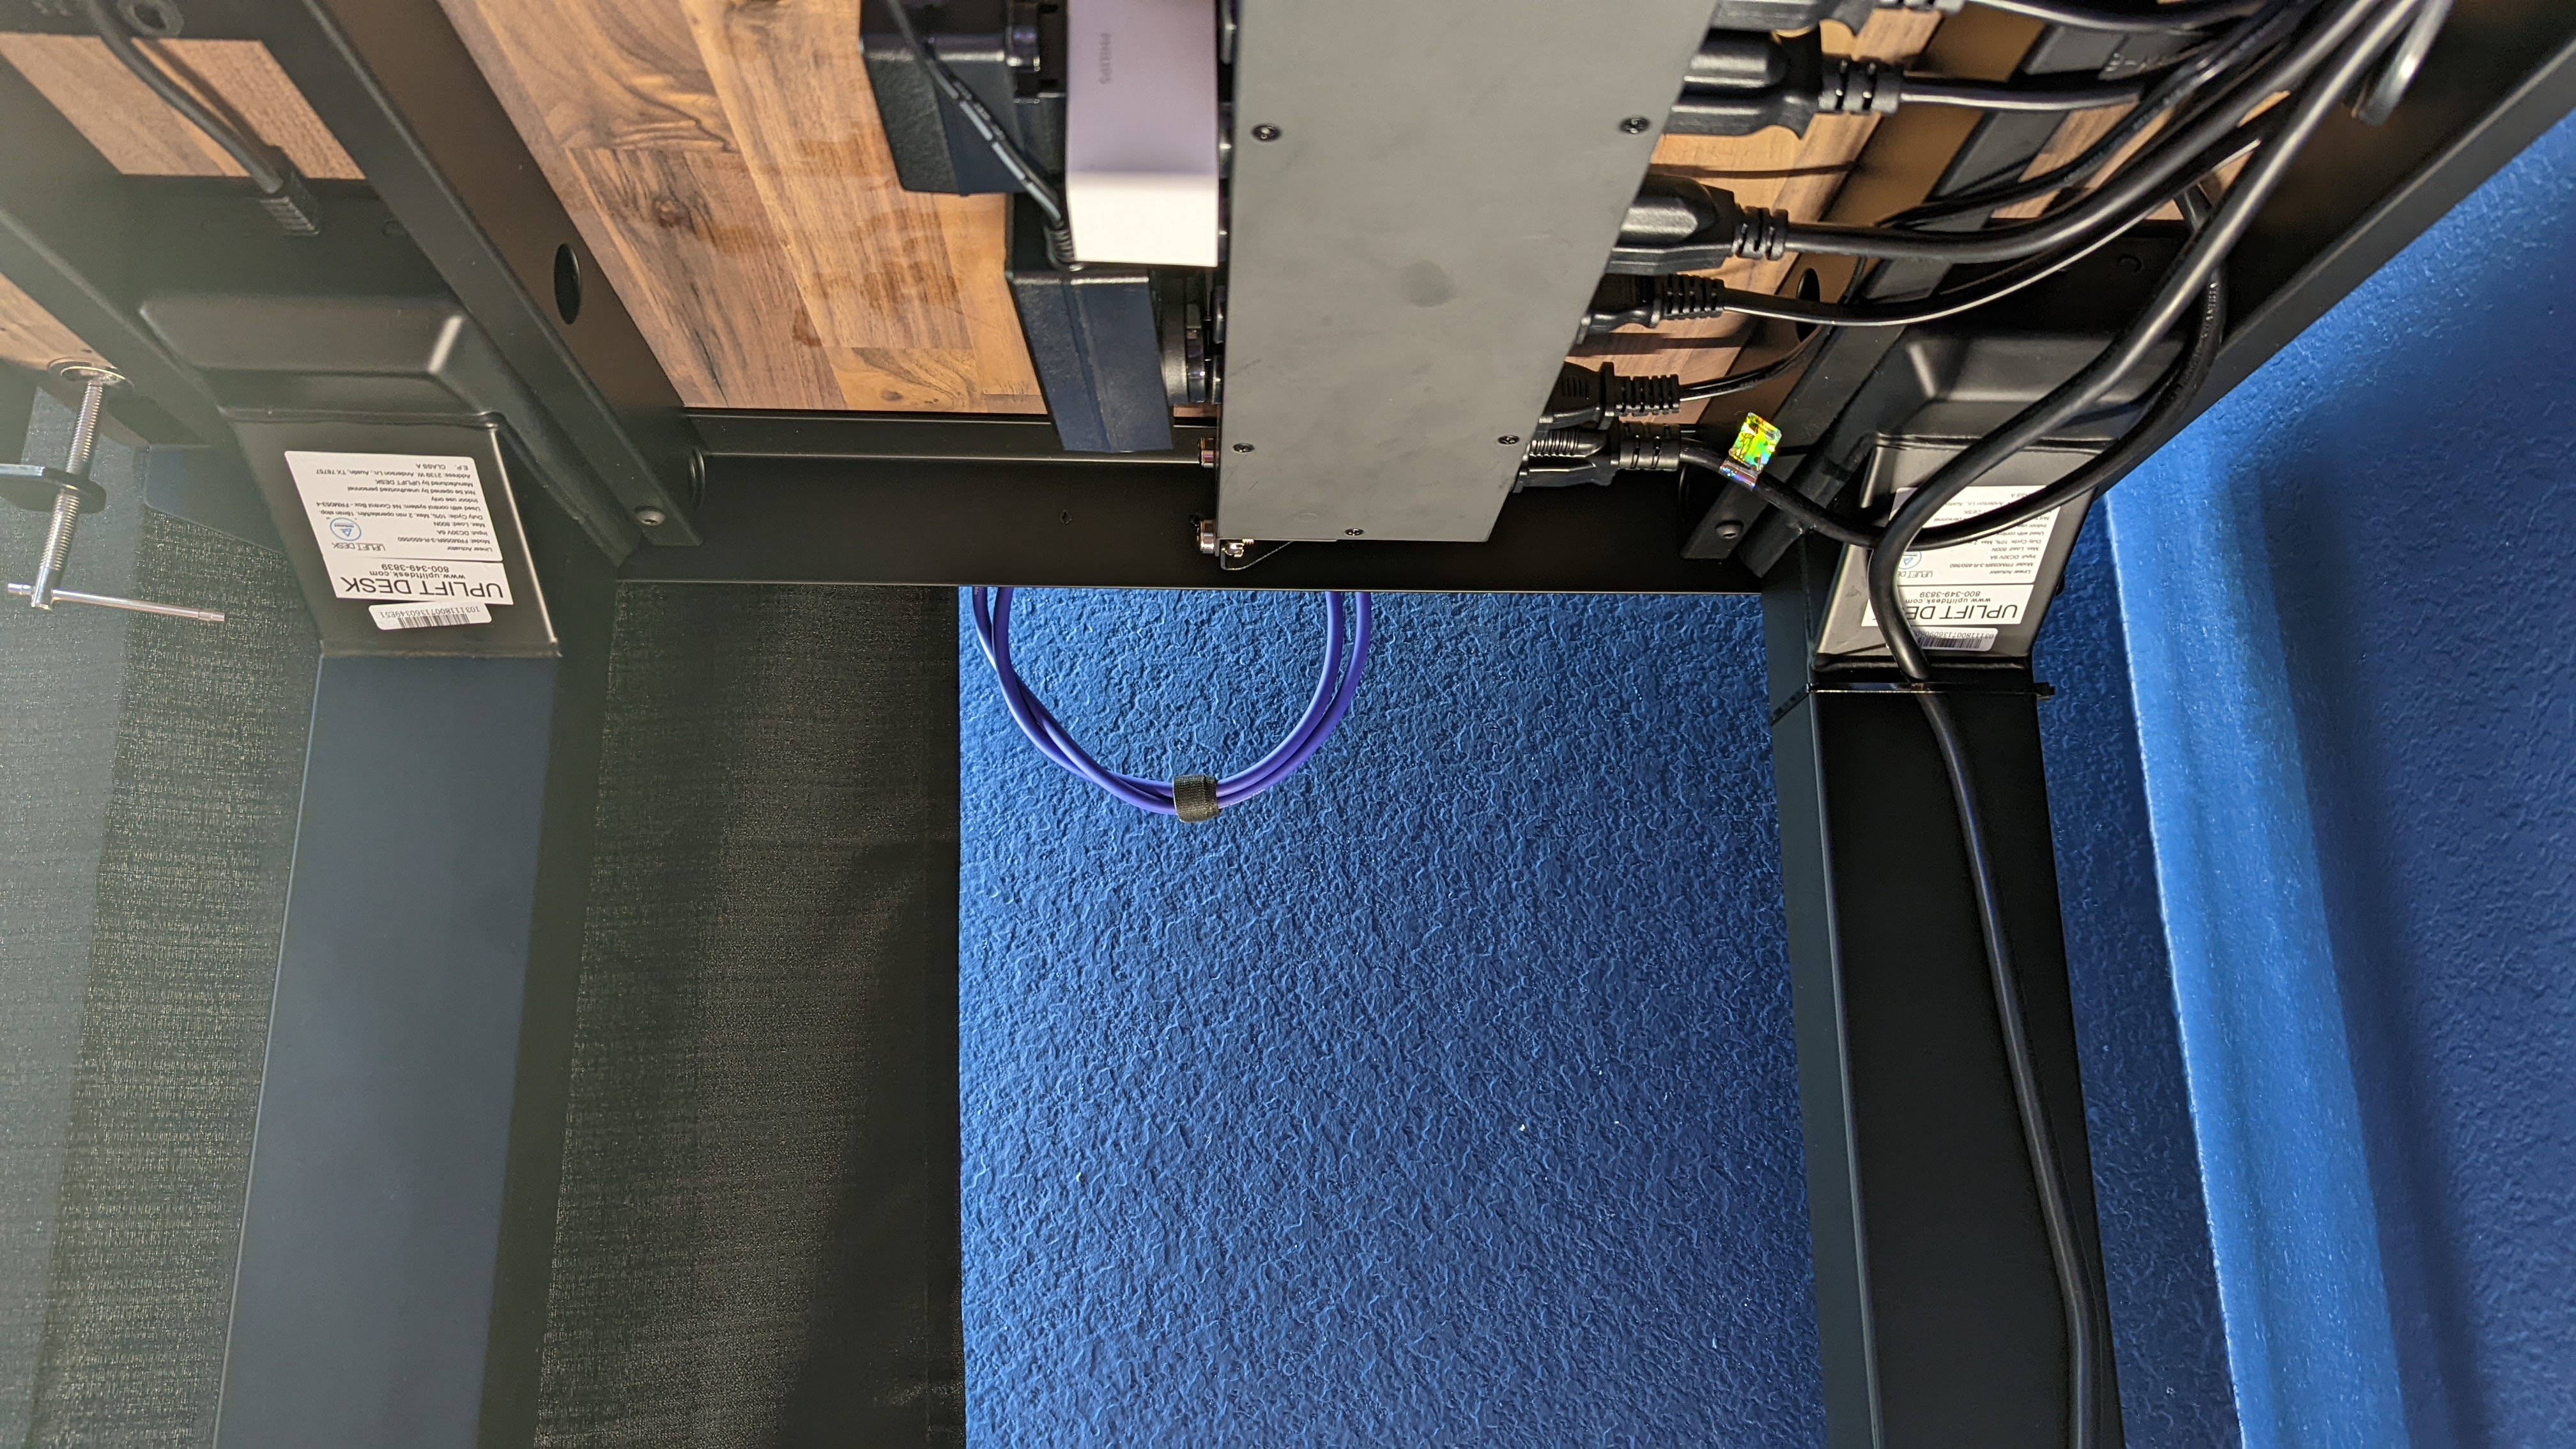
The first obstacle was supporting all 10 of my power cables. Some of them had heavy adapters on the plug, and I didn't want them to fall out of a power supply attached under the desk. So I purchased a Tripp Lite rack mount power supply, and a 1U rack mount.
The rack mount kept a low profile on the power supply by mounting it horizontally. The power supply has two sides, one of which has gaps for the larger adapters. It also comes with a built in surge protector, which is nice for peace of mind.
I drilled pilot holes and used screws to mount the rack to the underside of the desk. Then the power supply fastened securely to the front of the rack. The biggest drawback was the 15 foot long power cable coming from the power supply. I'll show you how I managed that in a later section.
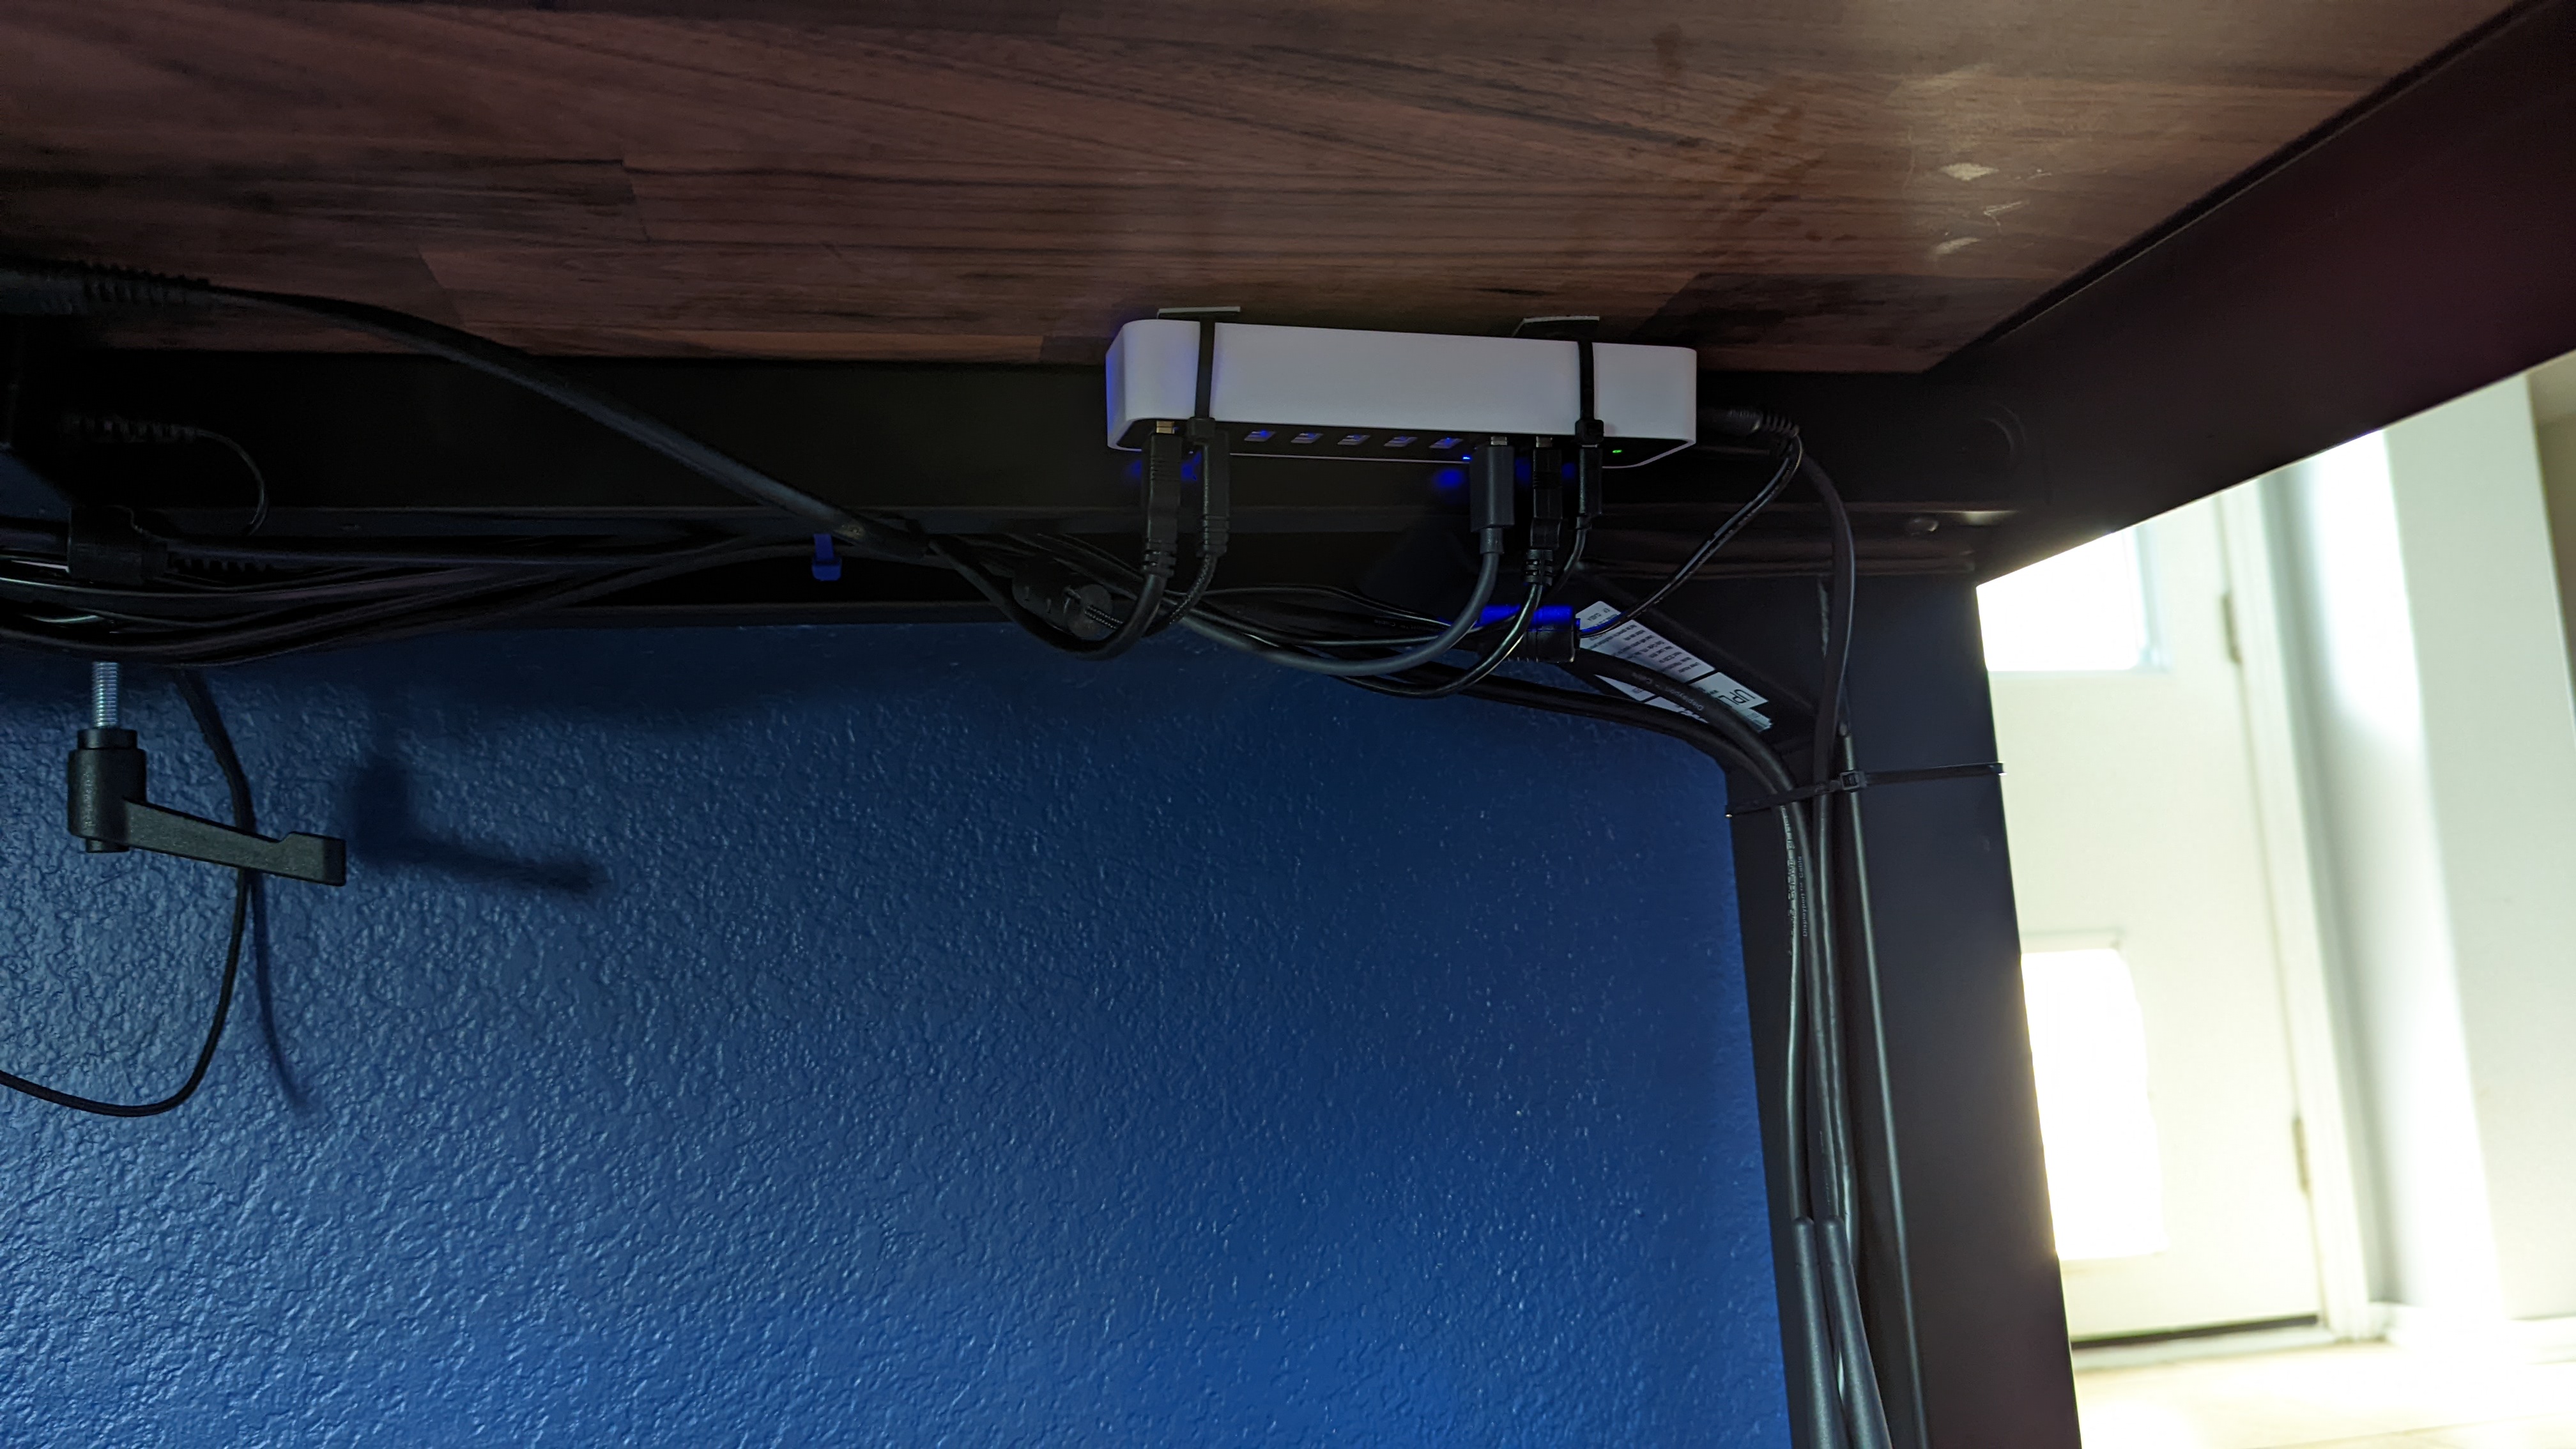
🚍 usb hub
To minimize the number of cables coming down from the desk and into my computer, I bought an Anker USB hub. It's powered independently, so I don't lose any bandwidth over the 10 ports. I positioned it directly over my computer so I could easily run a single cable from the hub into the computer.
🔌 cable management
This was the hard part. It took a lot of patience over about six hours to manage all of the cables. I used zip tie mounts and zip ties to attach the cables to the desk, and a mixture of zip ties and velcro strips to keep them bundled up. I ran cables one at a time, and zip tied them into place as I went. While I wasted a ton of zip ties this way, it was the only effective way to keep the cables in place while I was working.
I used the channels at the front and back of the desk to run cables horizontally, using plenty of zip tie mounts as support. For cables that needed to cross through the center of the desk, I had a single laneway close to the desk controller to keep things tidy. The 15 foot power supply cable was tricky, it was so thick that I didn't want to use any of the previous lanes, so I wrapped it in a circle near the power supply.
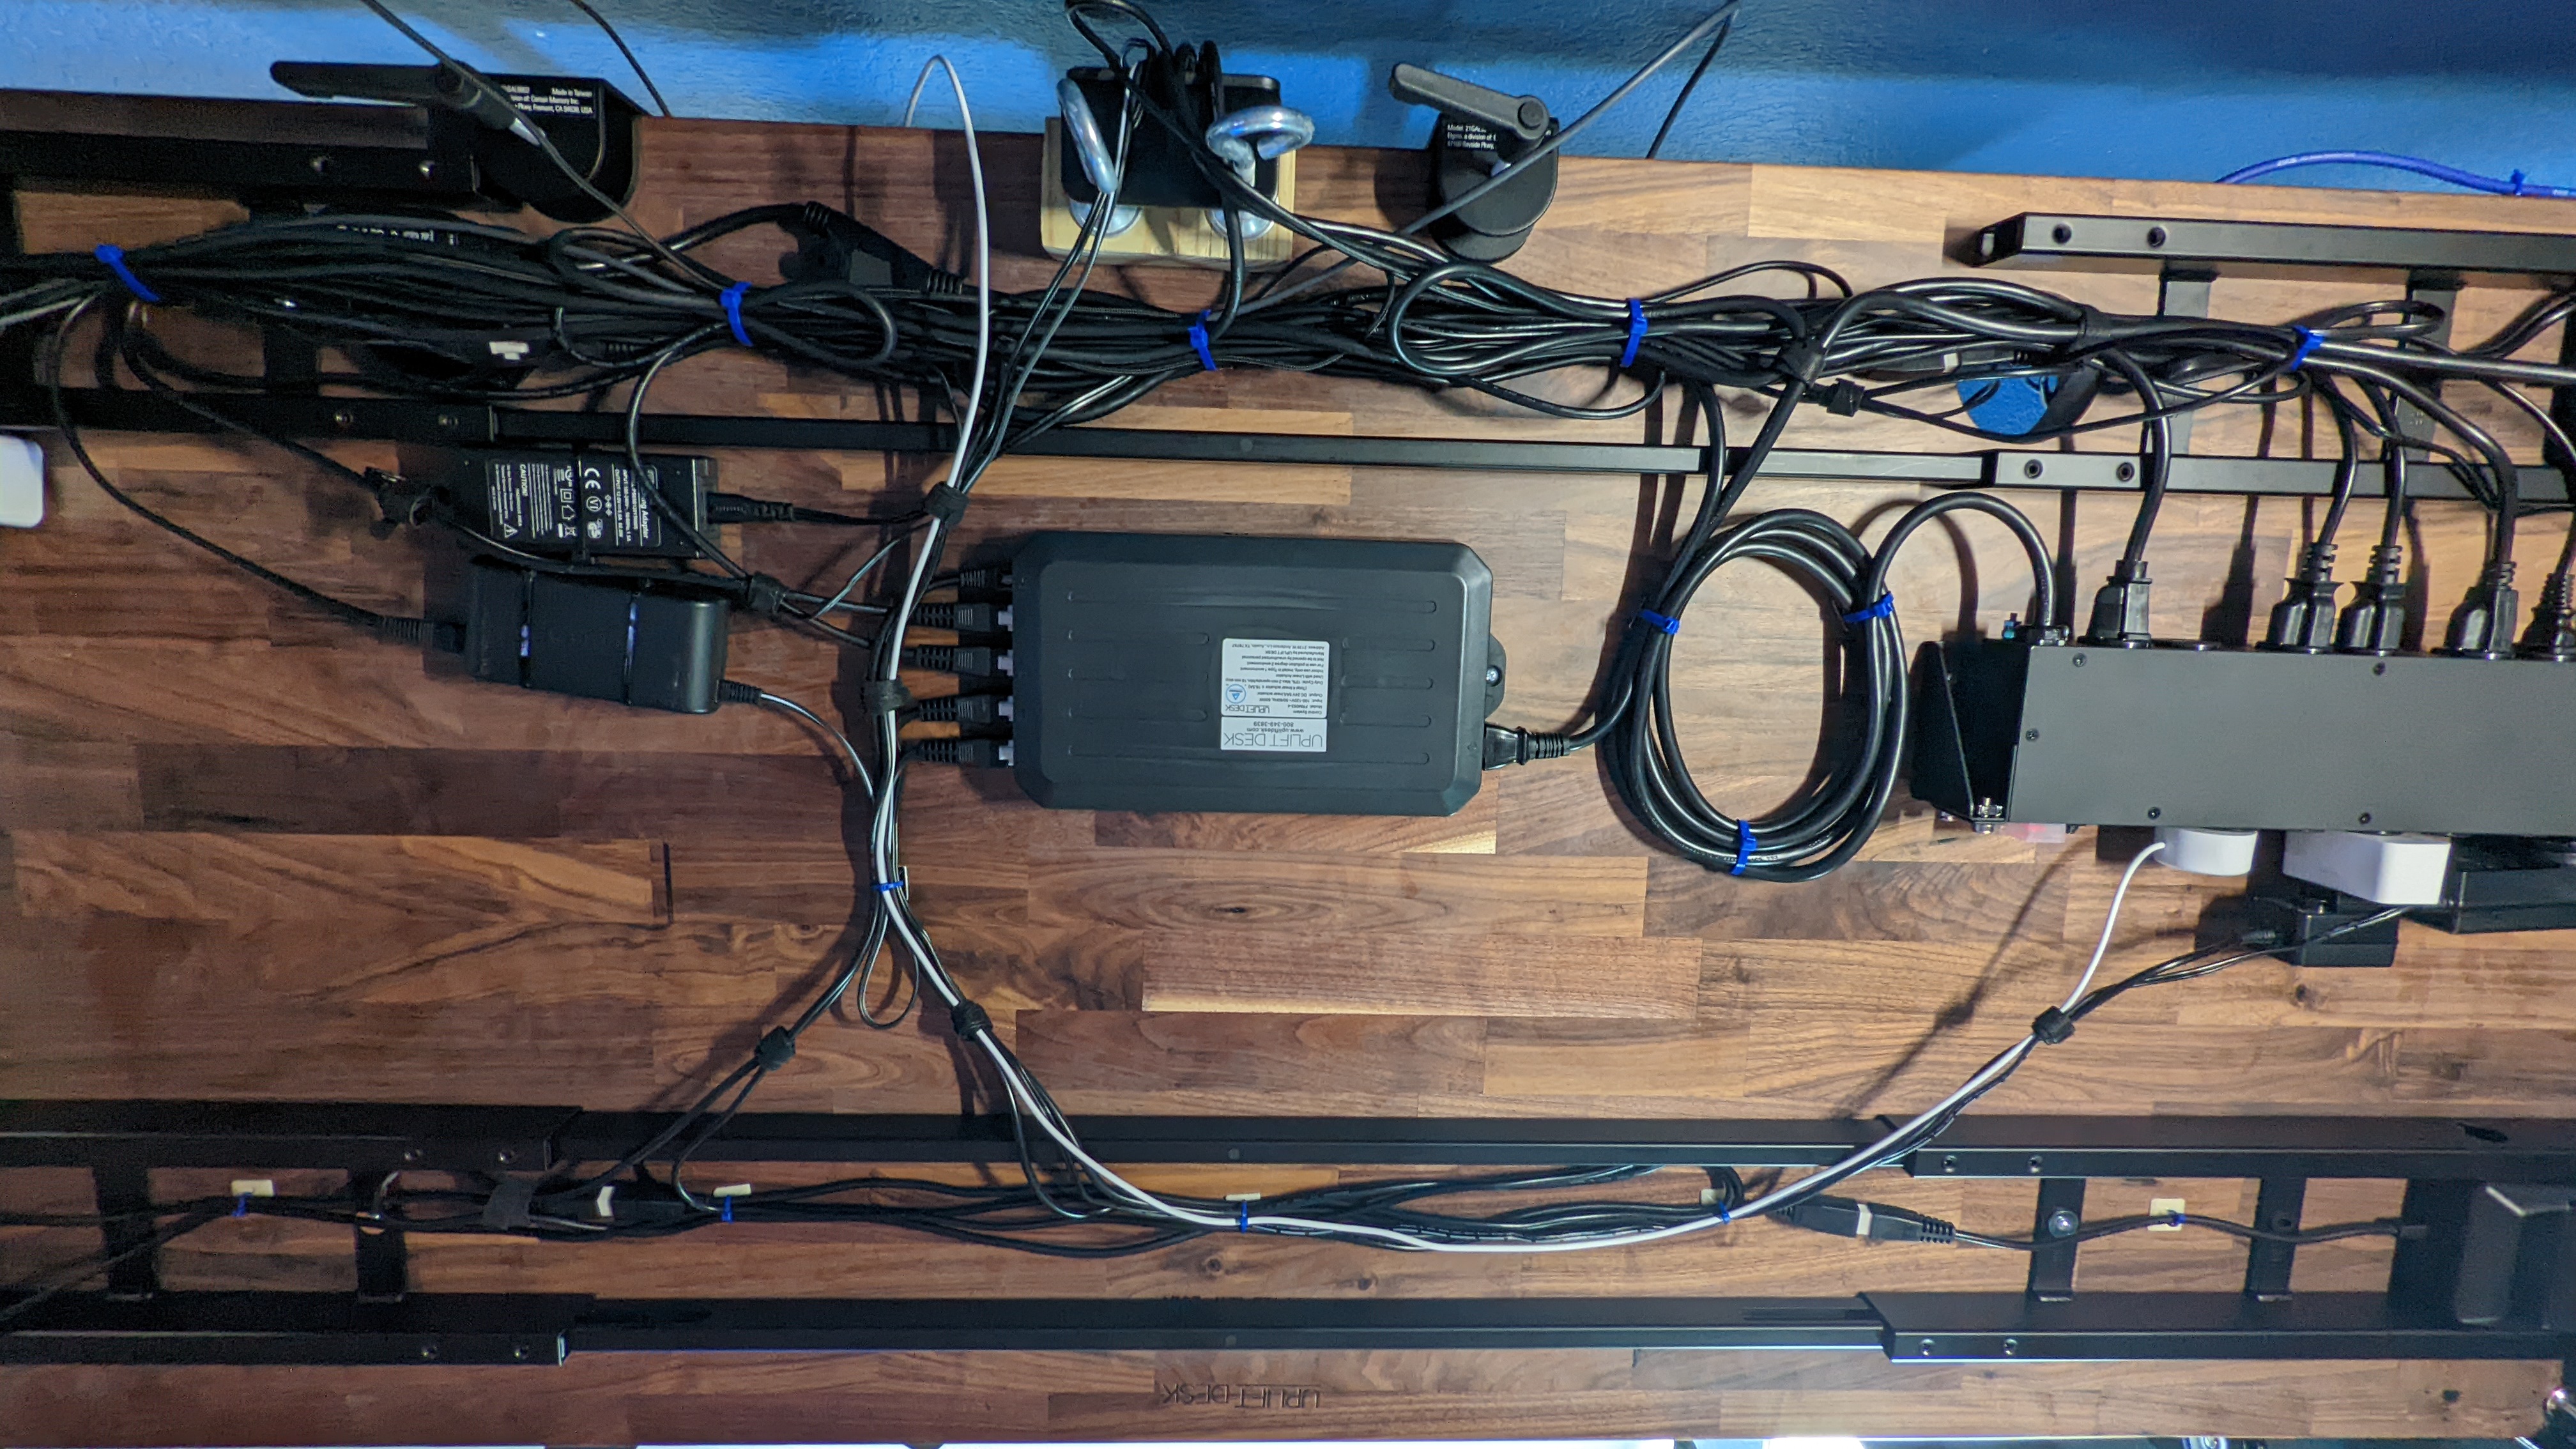
The only real problem I encountered while doing this was the audio cable. I got everything connected, then sat down at my computer to test everything. My microphone was very noisy, with a ton of background hiss. I realized that the XLR cable was experiencing interference by being bundled with all of the other wires. So I removed it from the major lanes that I had created and strung it up on the side of the desk.
If you're curious about how everything is actually wired up, I created a wiring diagram of the entire setup if you want to check it out.
🤩 finished
Overall, everything worked according to plan! Now I have a picturesque workspace that I can use sitting or standing. Now it's time for you to share your setups! Post a photo of your desk and tag me on Twitter or in Discord, I'd love to see what your workspace looks like!